Set up your centre in Pillar OS
Use the setup guide, enter your centre's details and booking rules, and add your logo so you are ready for a first session.
 Written by the Pillar OS team Updated November 2, 2026
The setup guide takes you from an empty account to your first booked session, one short form at a time. Everything it saves can be changed later in Settings.
Follow the setup guide
Where: Dashboard › Workspace health › First-run setup
- Open the guide. The left side lists the Essentials, with a tick beside each one already done.
- Click a step, fill in its form and click Save and continue. Pillar moves you to the next step that still needs doing.
- Work through the essentials: Confirm workspace basics, Add your first tutor, Add your first student, Create an offering, Set your billing policy, Set the price of a session and Schedule your first session.
- Click Skip for now to leave a step for later, or Finish later to go back to the Dashboard.
- When every essential is done, the page says Your workspace is ready. Click Go to dashboard.
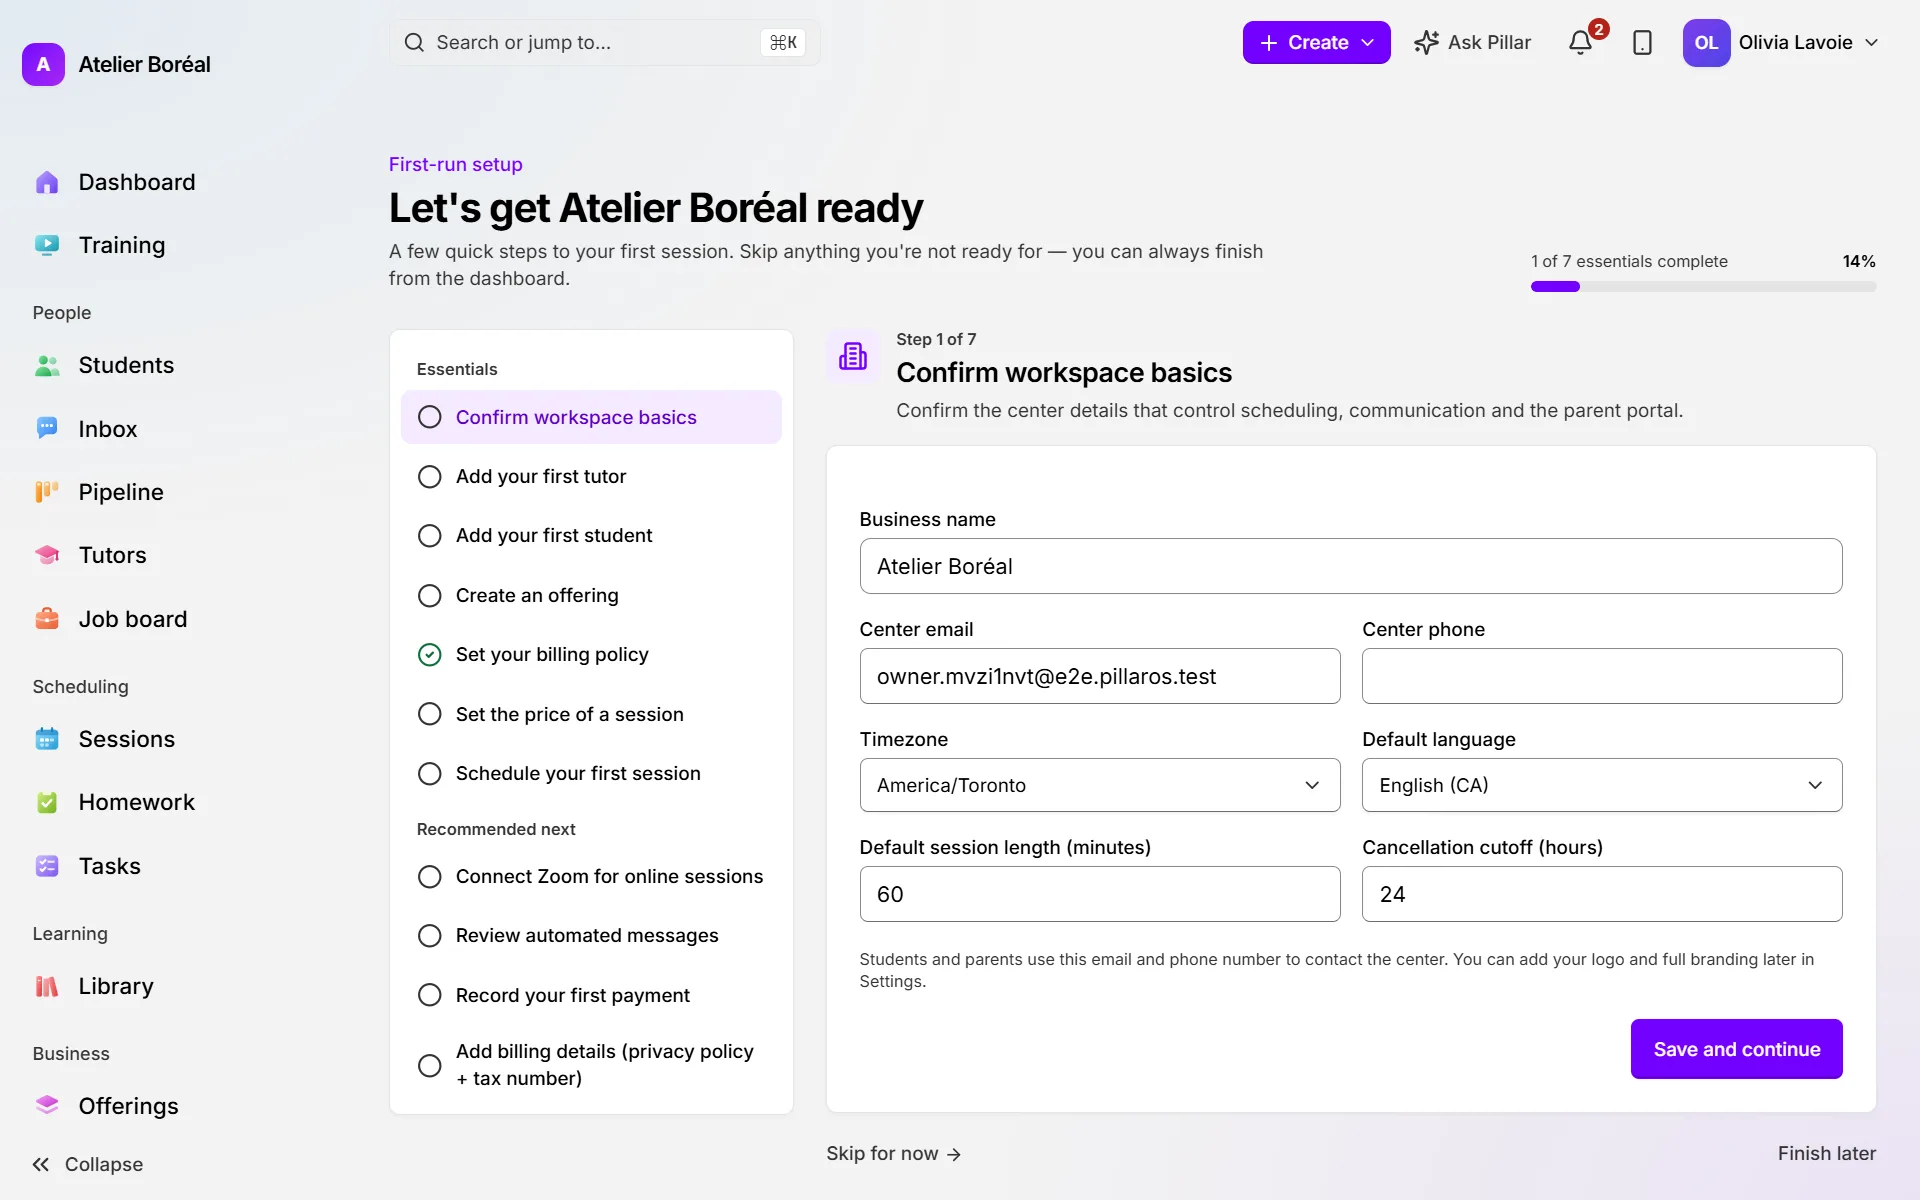
Under Recommended next, the guide also offers to connect Zoom, review your automated messages, record a first payment and add your billing details.
Change your centre’s name, language and contact details
Where: Settings › Your centre › Profile
- Under Identity, check the Business name and the URL identifier (the address of your portal and forms).
- Under Language & time, choose the Default language and the Timezone.
- Under Public contact, fill in the Public centre email and Public centre phone families see in their portal.
- Under Business address, enter your address.
- Click Save profile. Nothing on this page is kept until you do.
Set your lesson length and booking window
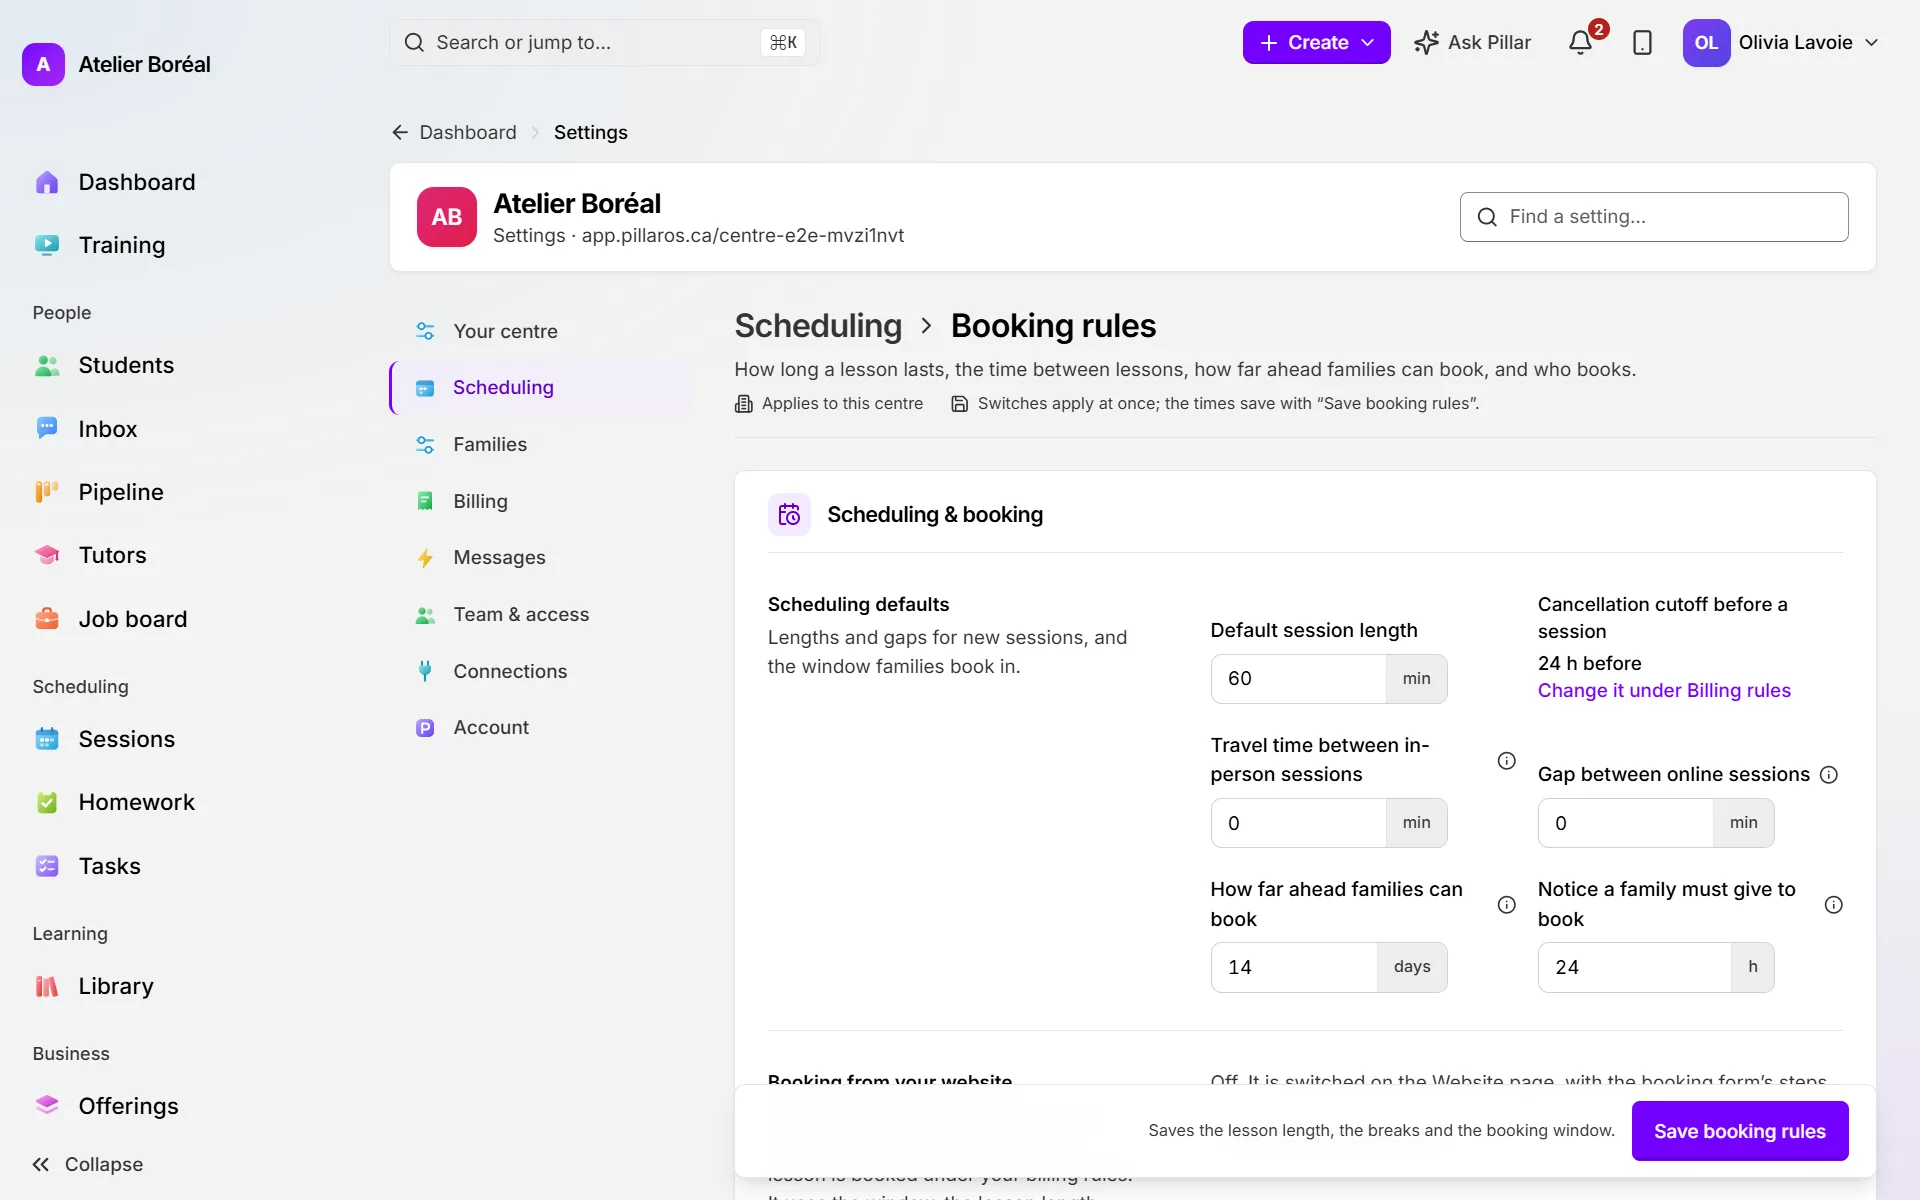
Where: Settings › Scheduling › Booking rules
- Under Scheduling defaults, enter the Default session length in minutes.
- Enter the Travel time between in-person sessions and the Gap between online sessions if you want time kept free between lessons.
- Set How far ahead families can book and the Notice a family must give to book.
- Click Save booking rules.
- Under Who books, set Families book online and Tutors manage their own availability the way you work. These switches apply at once.
Add your logo and colours
Where: Settings › Your centre › Brand & look
- Under Logo, click Upload image and pick your file. It saves at once.
- Under Colours, enter your Primary colour and Background colour.
- Click Save colours.
Did this answer your question?
Thank you. It helps us know what to write better.
Related articles
Still stuck?
Support is included with every plan. Write to us and a person replies.
Contact support