Add students and families
Add a student and their parent, add a brother or sister in one click, find any family, and choose who receives your messages.
 Written by the Pillar OS team Updated November 2, 2026
Each student in Pillar carries their family’s contact details, so one record holds the child, the parent and how to reach them. To bring in a whole list at once, see Import your students.
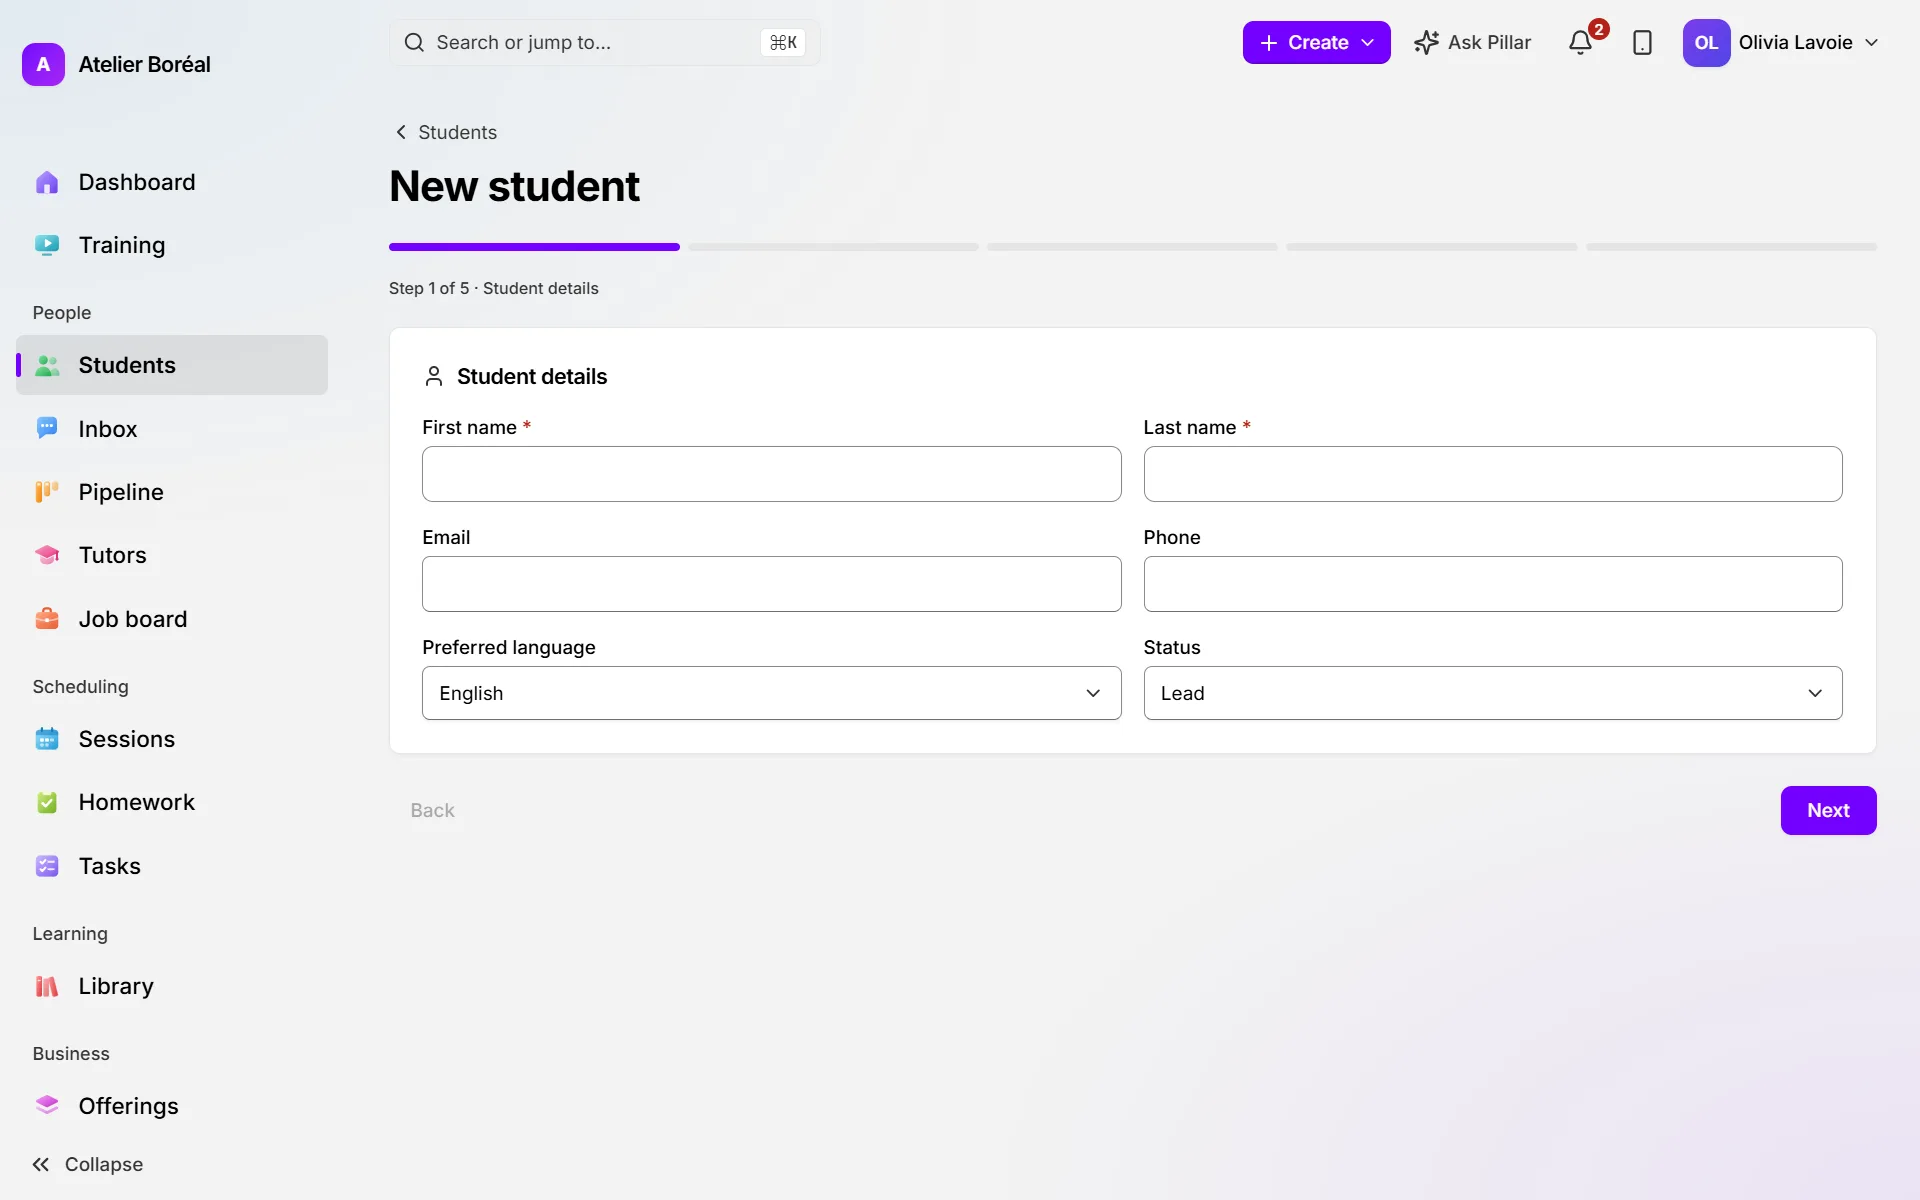
Add a student
Where: People › Students › New student
- On Student details, fill in the First name and Last name (both required). Choose the Preferred language and the Status: Active for a student you teach, Lead for a family still deciding. Click Next.
- On Family & communication, enter the parent’s name, email and phone under Parent information. Tick Student/parent consents to receive communications (CASL) if they agreed.
- On Learning setup, choose the Grade, the Subjects and a tutor under Assign tutor (or leave it unassigned).
- On Optional information, add the address and your centre’s own questions, if any.
- On Review & create, check the summary and click Create student. The student’s page opens.
Add a brother or sister
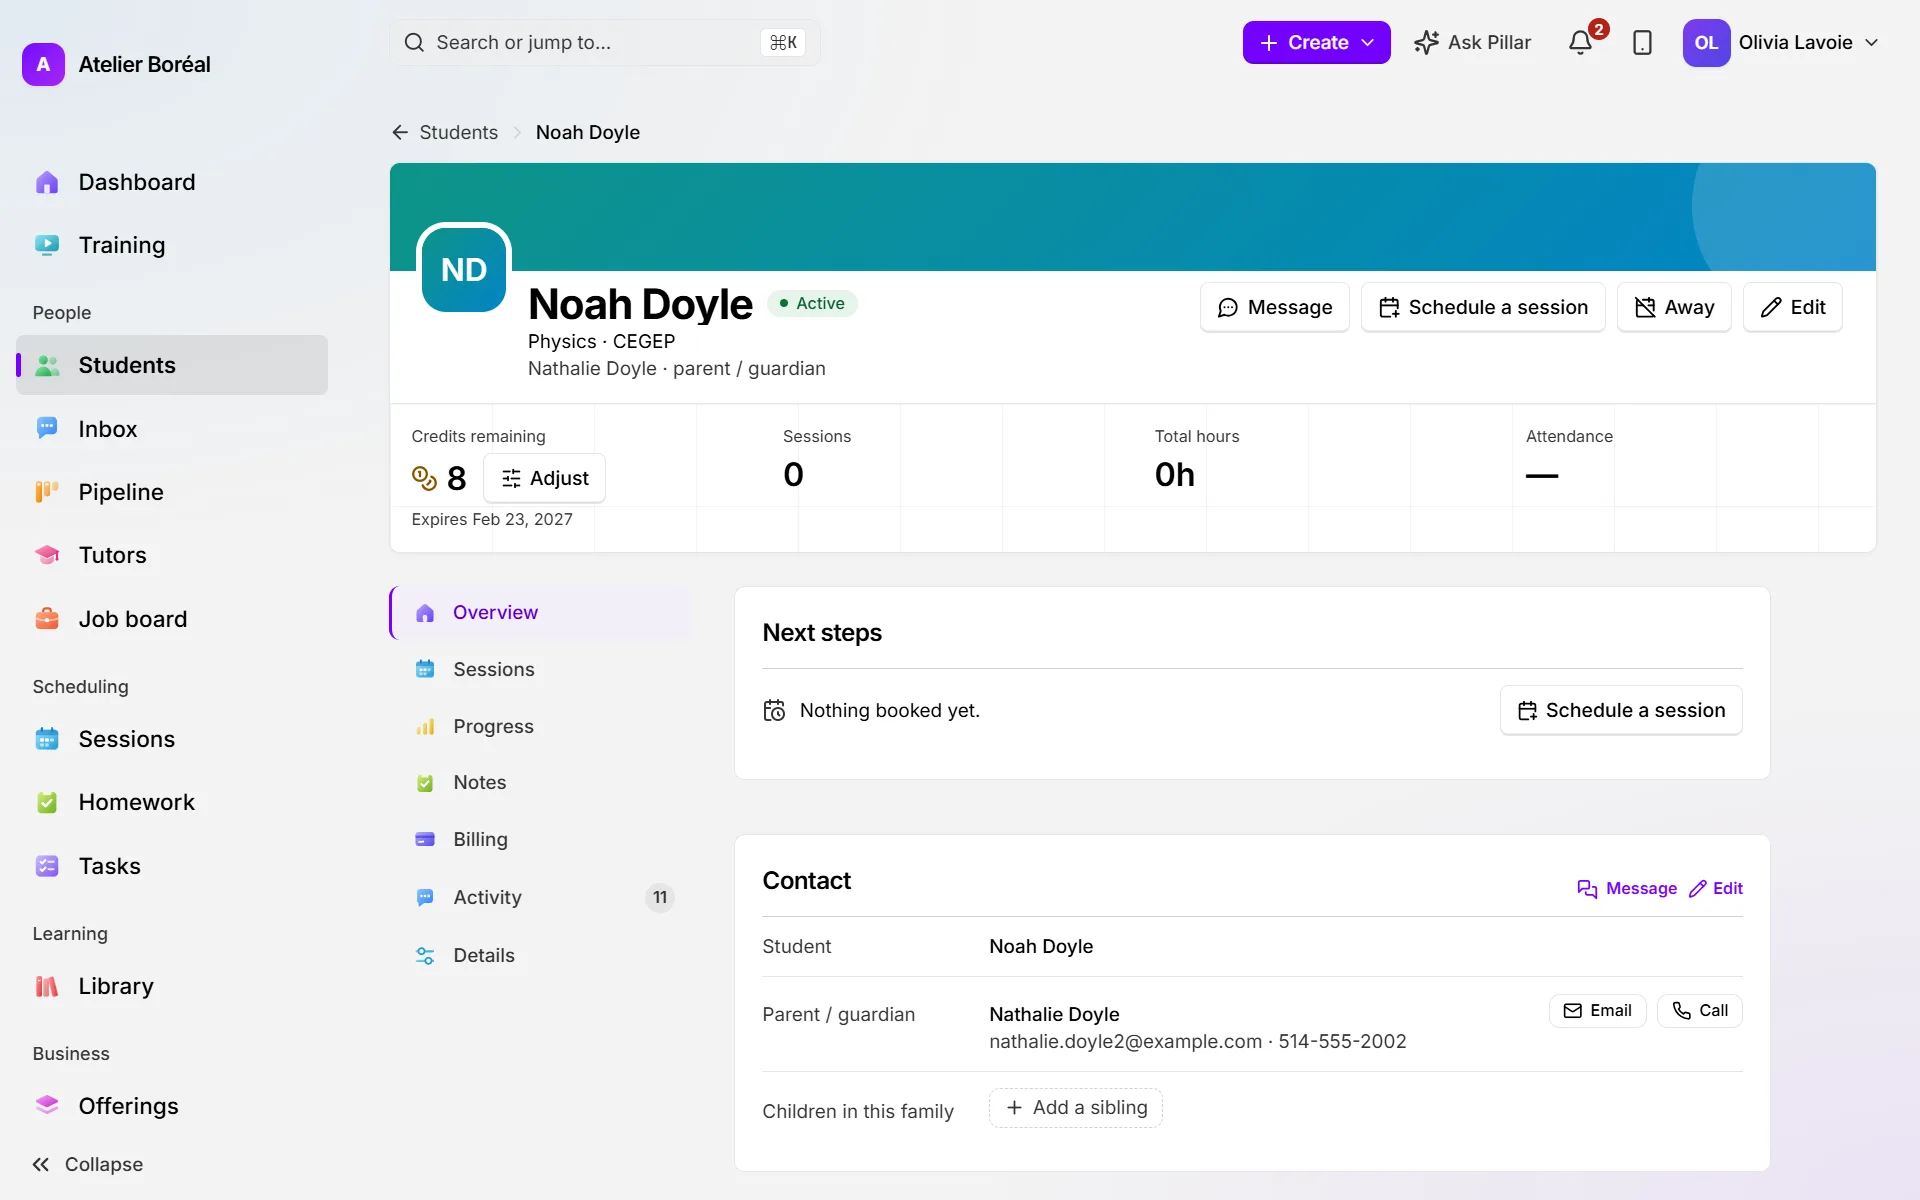
Where: the student’s page
- Click Add a sibling.
- The form opens with the family’s last name, parent, address and language already filled in.
- Enter the child’s first name and the rest, then click Create student.
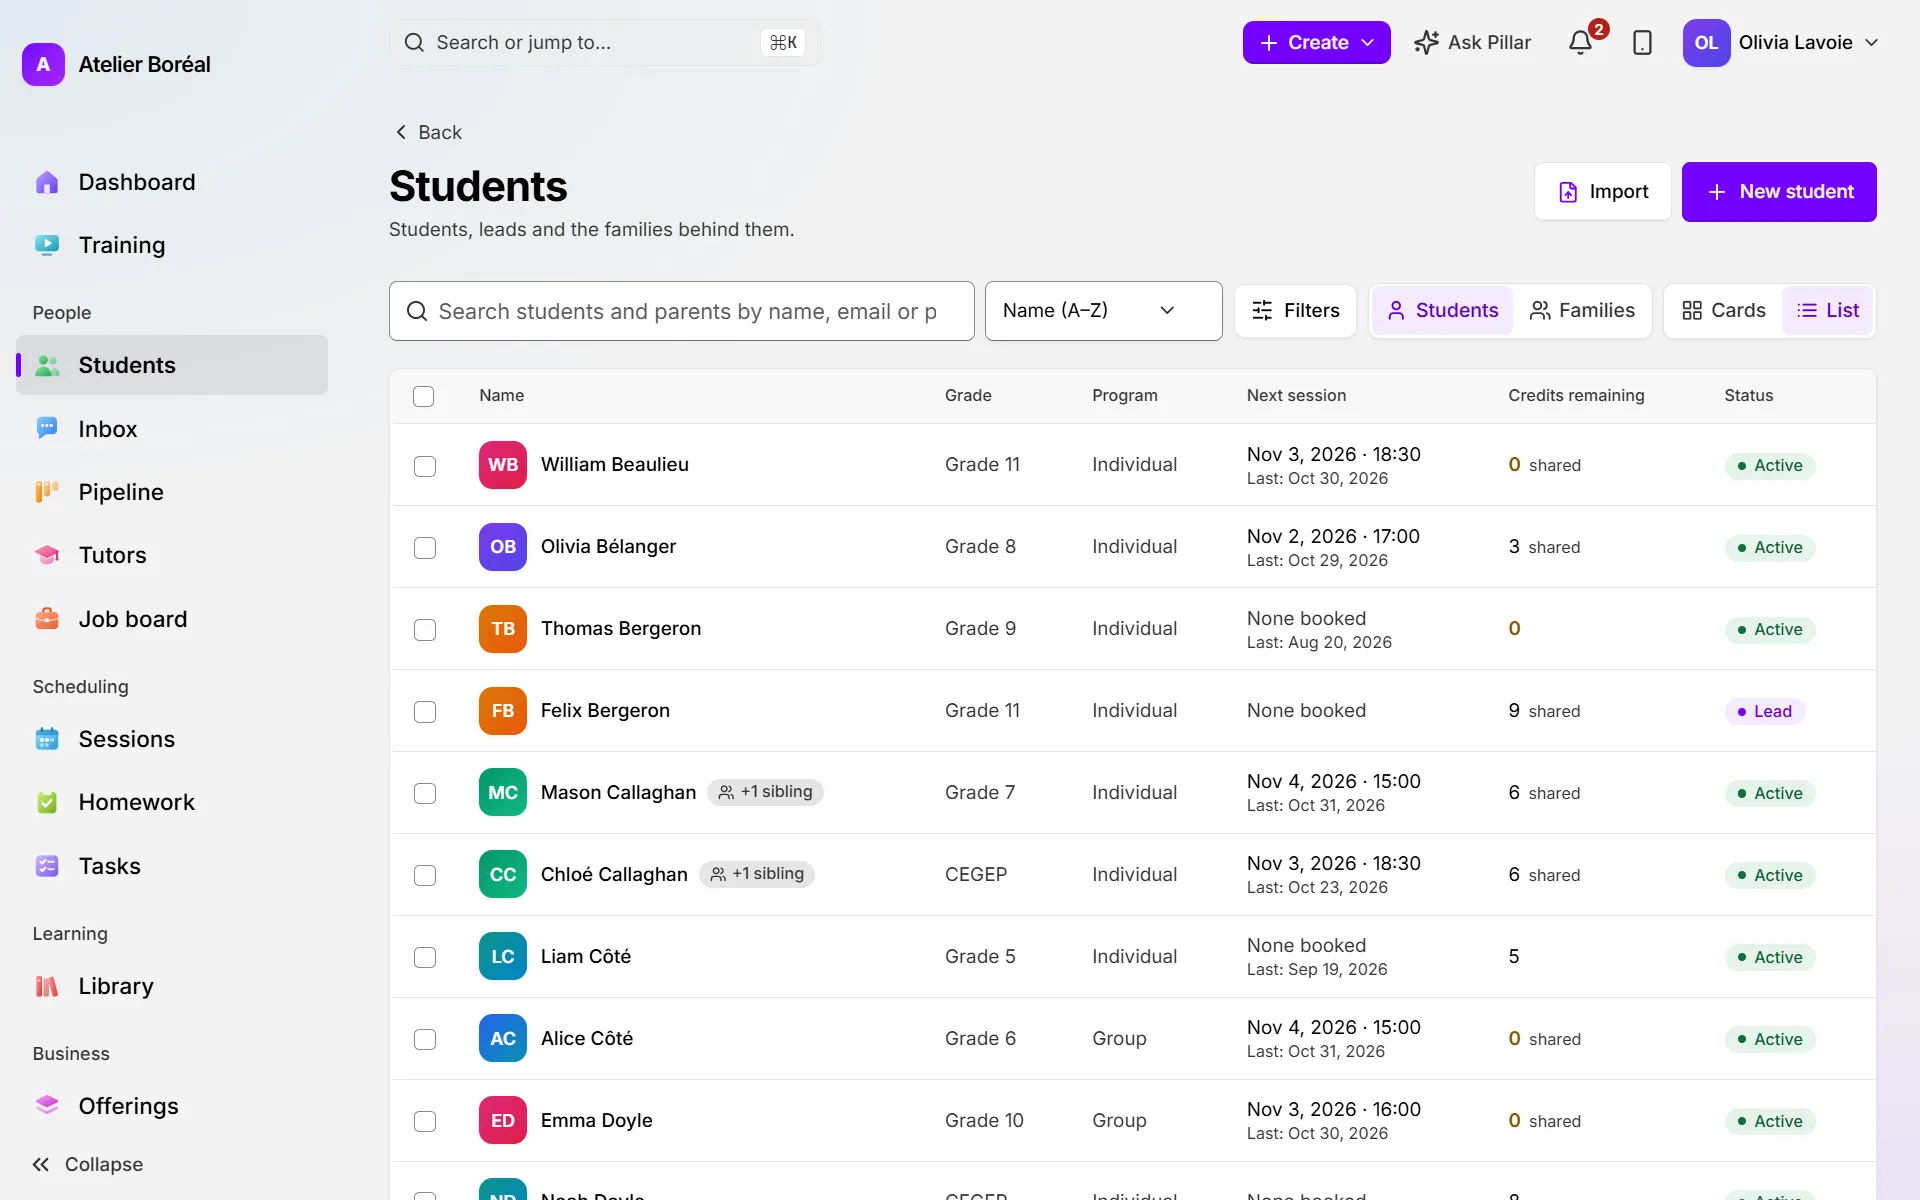
Find a student or see your families
Where: People › Students
- Type a name, email or phone number in the search box. It finds parents too.
- Click Filters to narrow by Status (Lead, Active, Paused, Alumni, Inactive) or by Work queue, for example No upcoming session.
- Switch between Students and Families to see one row per child or one row per parent.
Choose who receives your messages
Where: the student’s page › Edit › Family & communication
- Under Message recipient, choose Automatic (by age), Always parent / guardian or Always the student.
- For the automatic choice, fill in the Date of birth: under 18, messages go to the parent; 18 or older, to the student. With no date of birth, they go to the parent.
- Click Save.
Did this answer your question?
Thank you. It helps us know what to write better.
Related articles
Still stuck?
Support is included with every plan. Write to us and a person replies.
Contact support