Homework, courses and materials
Give homework after a lesson, correct what students hand in, build courses with lessons, and share worksheets and files with the right students.
 Written by the Pillar OS team Updated November 2, 2026
Give homework from a lesson, correct it when the student hands it in, and keep your teaching content in the Library: courses made of lessons, and materials such as worksheets and handouts.
Give homework after a lesson
Where: Scheduling › Sessions › the session
- Open the session and click Give homework.
- Type a Name and What to do.
- Attach a worksheet, or pick one From the library.
- Choose when it is Due: the next session, a date you pick, or no due date.
- Tick the Students, then click Give homework. The family is told right away.
Correct homework
Where: Scheduling › Homework
- Open the To correct tab and click Correct beside the homework.
- Under Your correction, drop in the corrected pages (or Take a photo), write a note for the student, or both.
- Click Send correction. The family gets a notification and an email.
- If you went over it together in class, click Went over it in the session instead. It counts as corrected and nobody is notified.

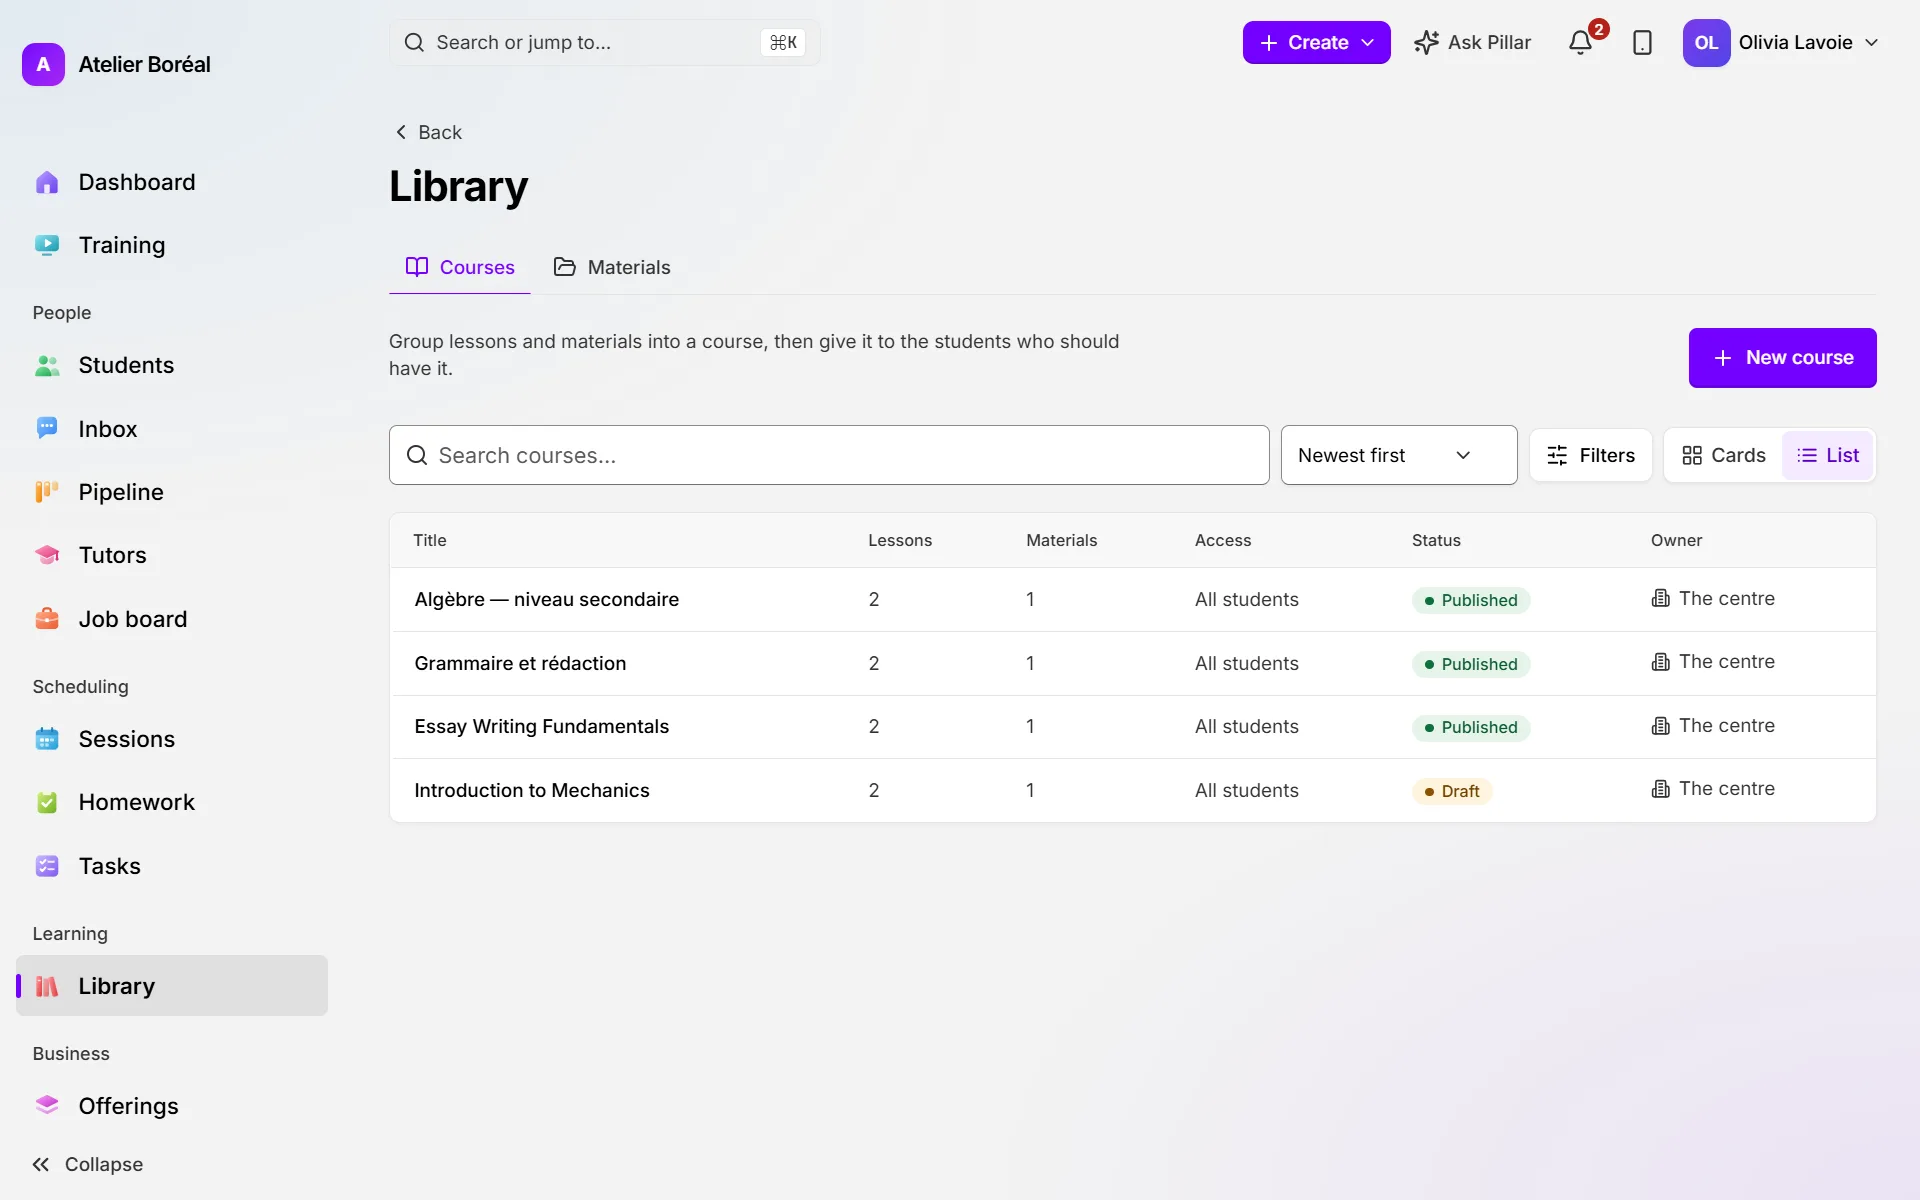
Build a course
Where: Learning › Library › Courses
- Click New course, type the Course title, then click Create course.
- On the course page, click Add lesson. Fill in the Lesson title, a video or PDF link if you have one, the duration and the status (Draft or Published), then click Create lesson.
- Open the lesson and click Edit lesson to write its content block by block, then Save changes.
- Click Edit course and set Access to All students or Assigned only. With Assigned only, open Access and click Assign beside each student.
Share a worksheet or file
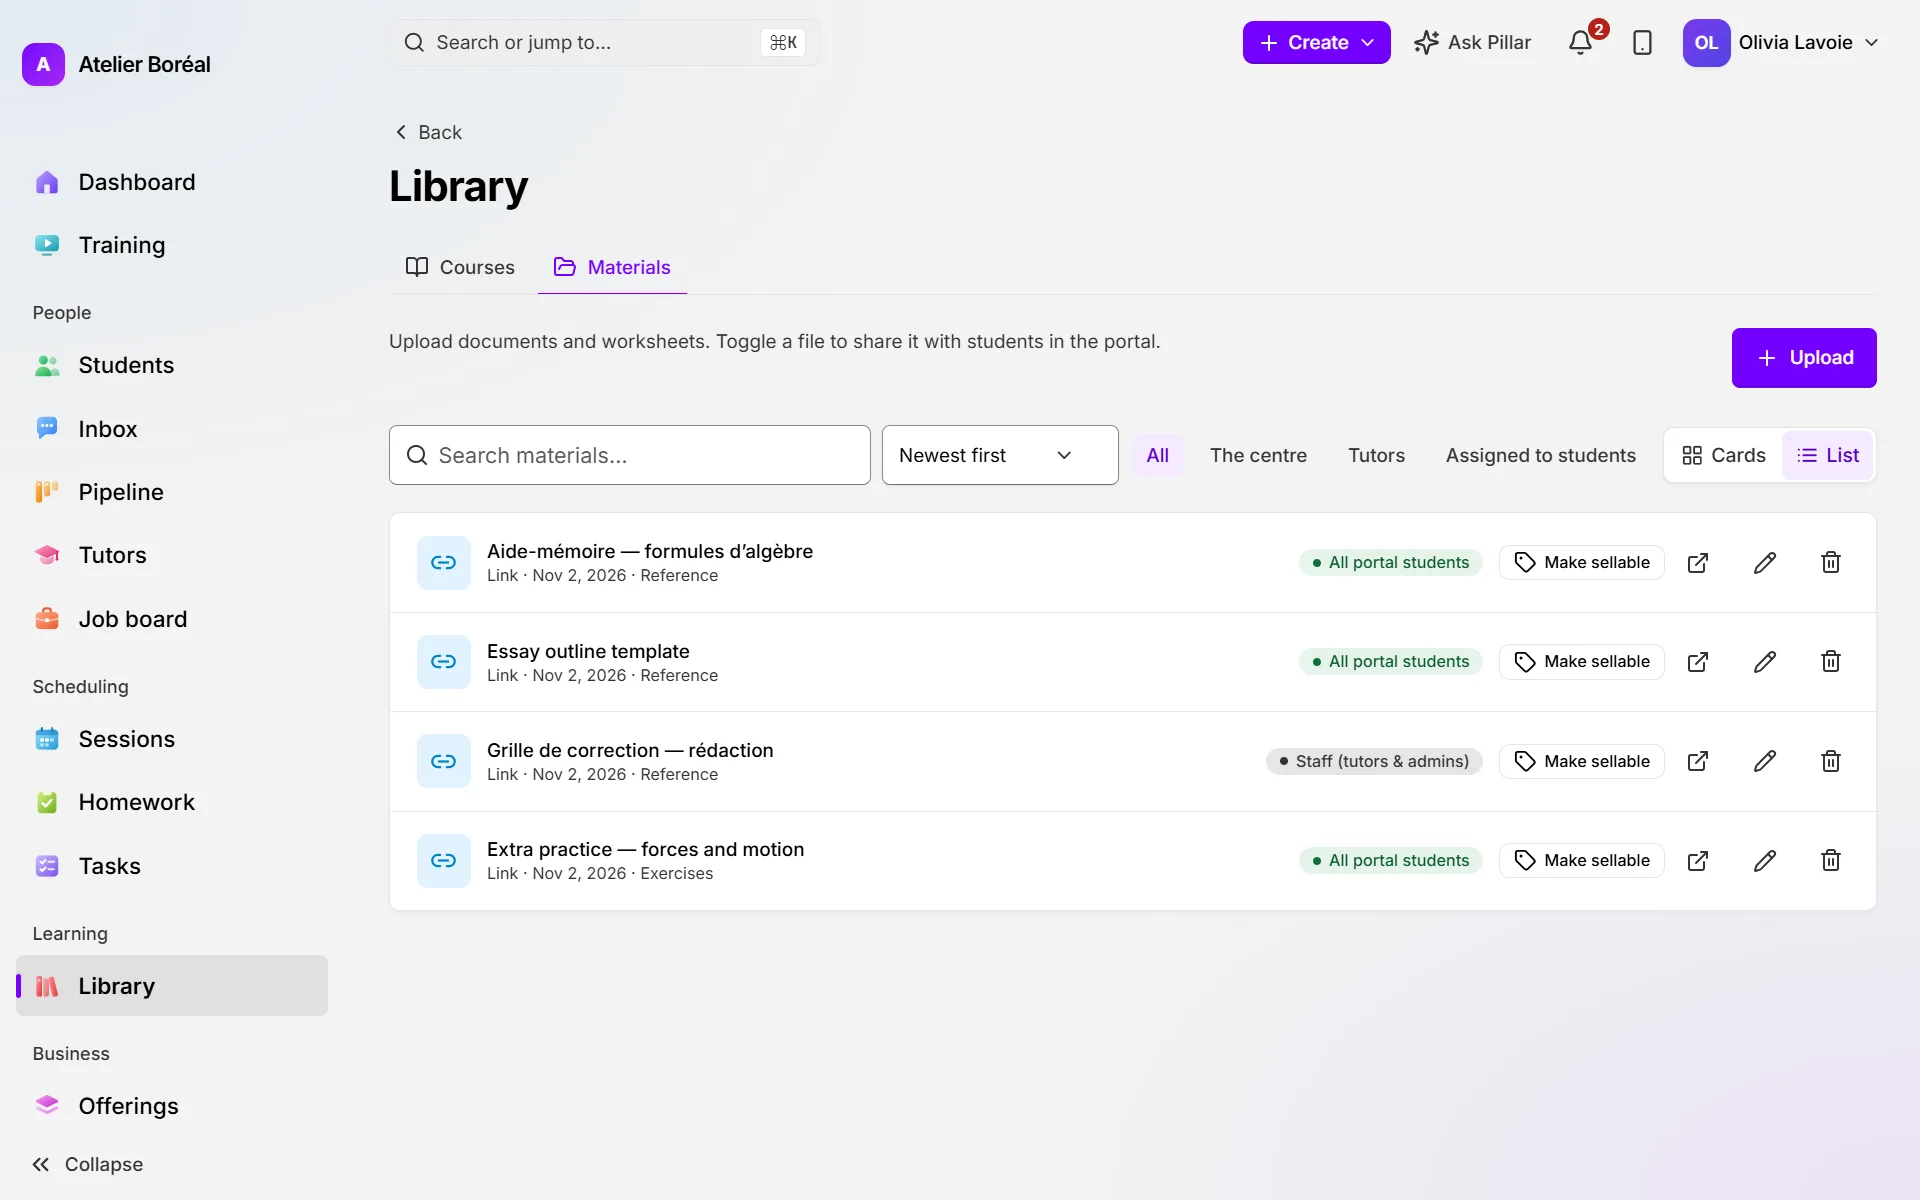
Where: Learning › Library › Materials
- Click Upload and choose the file (up to 25 MB).
- Give it a Title, and if you like a course or category.
- Choose its Visibility: Admins only, Staff (tutors & admins), All portal students or Specific students, then click Upload.
- For Specific students, use Give to a student… to pick each student. Nobody sees it until you do.
Did this answer your question?
Thank you. It helps us know what to write better.
Related articles
Still stuck?
Support is included with every plan. Write to us and a person replies.
Contact support